Ubuntu(Linux)のホストOSでVirtualBoxのゲストOS(Windows 10仮想マシン)とファイル共有する設定方法をご紹介しています。
「Ubuntu 22.04.1 LTS」でご説明しています。
スポンサードリンク
目次
まずはじめにVirtualBox Guest Additionsをインストール
ファイル共有(共有フォルダー)を利用するには、VirtualBoxの仮想マシン(Windows 10)に、VirtualBox Guest Additionsをインストールする必要があります。
デバイスメニュー>Guest Additions CDイメージのインストールを選択しGuest Additionsをインストール。仮想マシンを再起動すると共有フォルダーが利用可能になります。
インストール方法は下記の記事をご覧になってください。
Ubuntuのディレクトリを確認
Ubuntuの現在のディレクトリを確認するには、
pwdコマンドを使います。
端末で、pwdと入力すると、
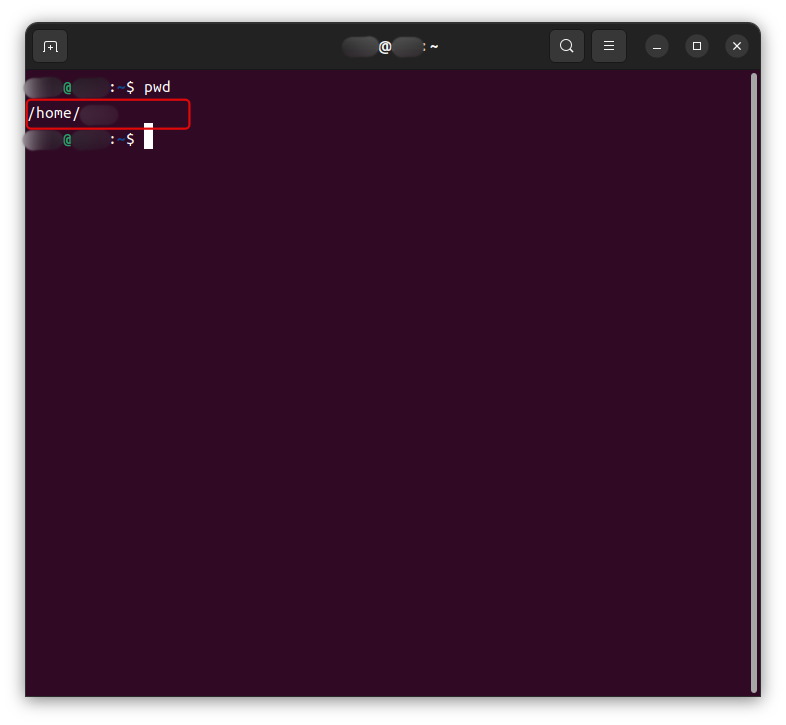
現在、作業中のディレクトリが表示されます。
/home/○○○○○の部分がディレクトリになります。
VirtualBoxの仮想マシン(Windows 10)とファイル共有するには、このディレクトリを使用します。
ゲストOS(Windows 10仮想マシン)を起動
ファイル共有(共有フォルダー)を設定するには、UbuntuのVirtualBoxでWindows 10の仮想マシンを起動します。
ファイル共有(共有フォルダー)の設定
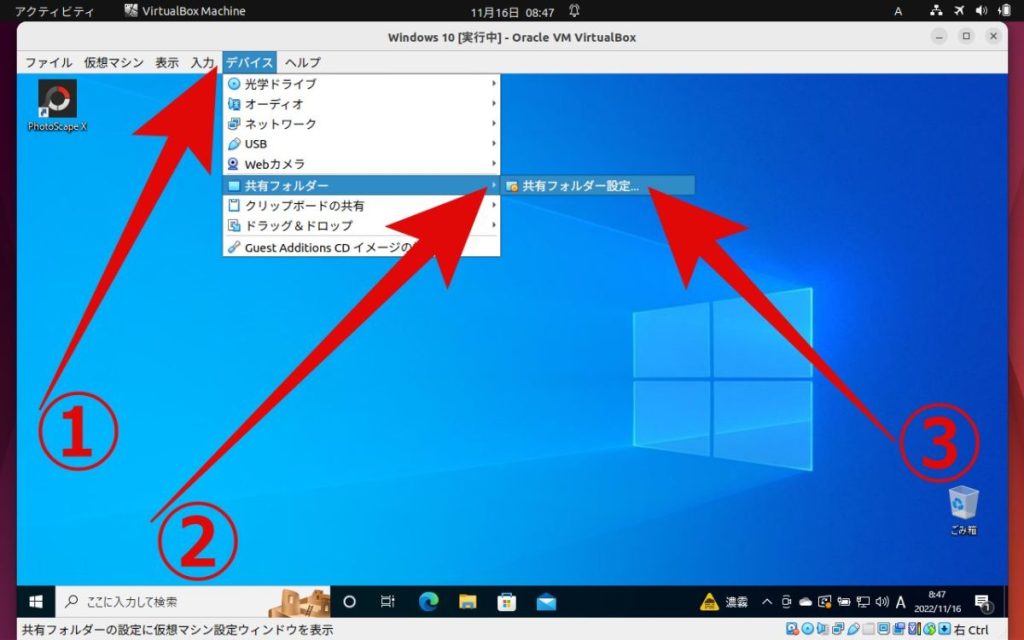
仮想マシンが起動しましたら、上部にあるVirtualBoxのメニューから「デバイス」をクリックし、「共有フォルダー」>「設定」の順にクリックすると、
共有フォルダーの設定画面になります。
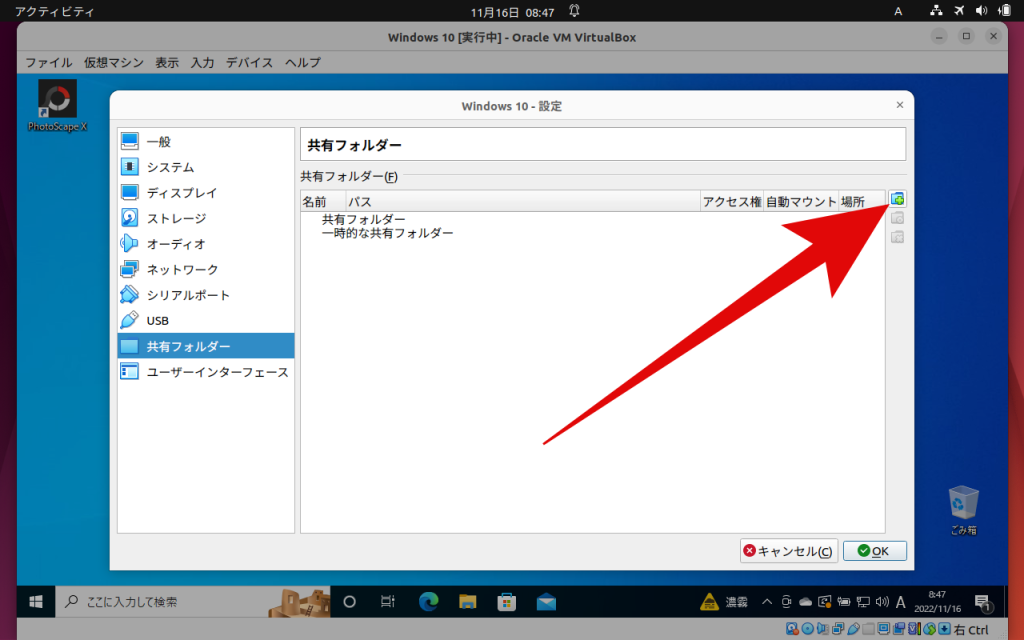
右側にあるフォルダーアイコンをクリックして、新規共有フォルダーを追加します。
共有フォルダーの追加画面になります。
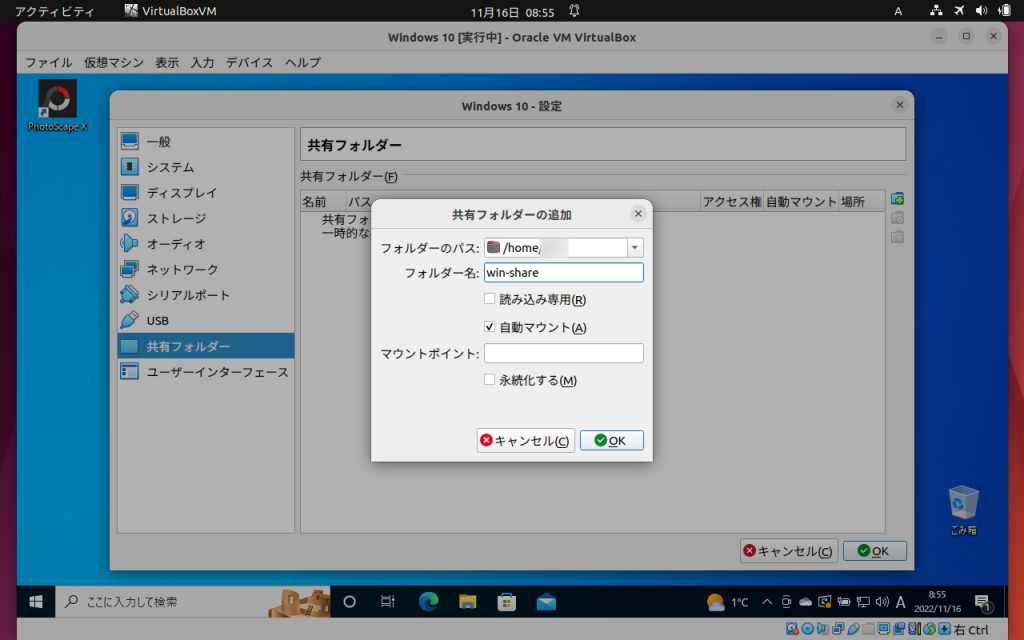
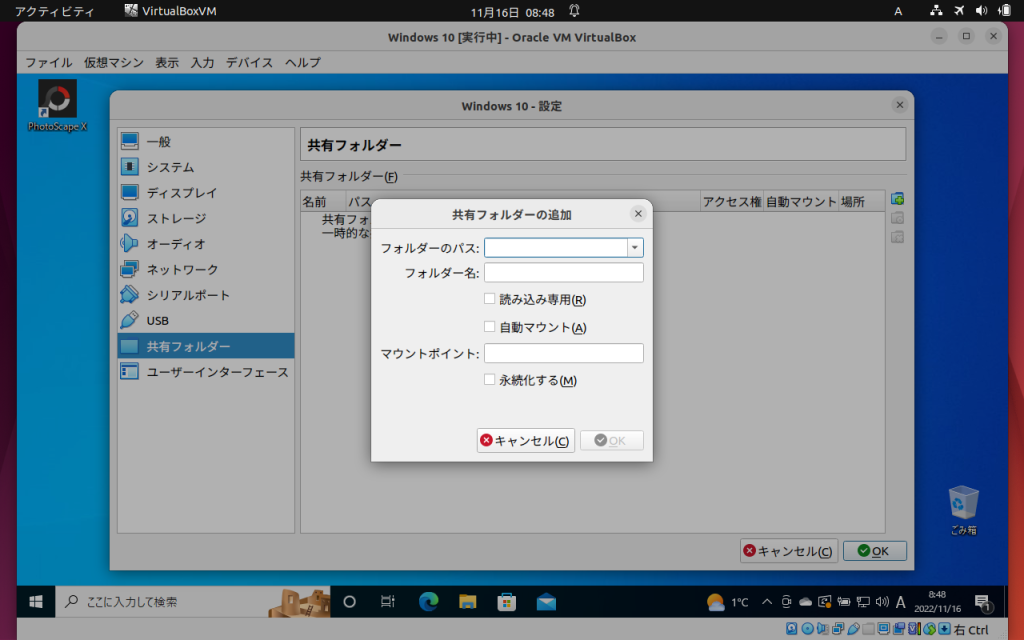
フォルダーのパスには、Ubuntuのディレクトリを入力します。
先ほど調べた「/home/○○○○○」がそうです。
フォルダー名は、お好みで。私はwin-shareにしました。
自動マウントにチェックを入れて、OKをクリック。
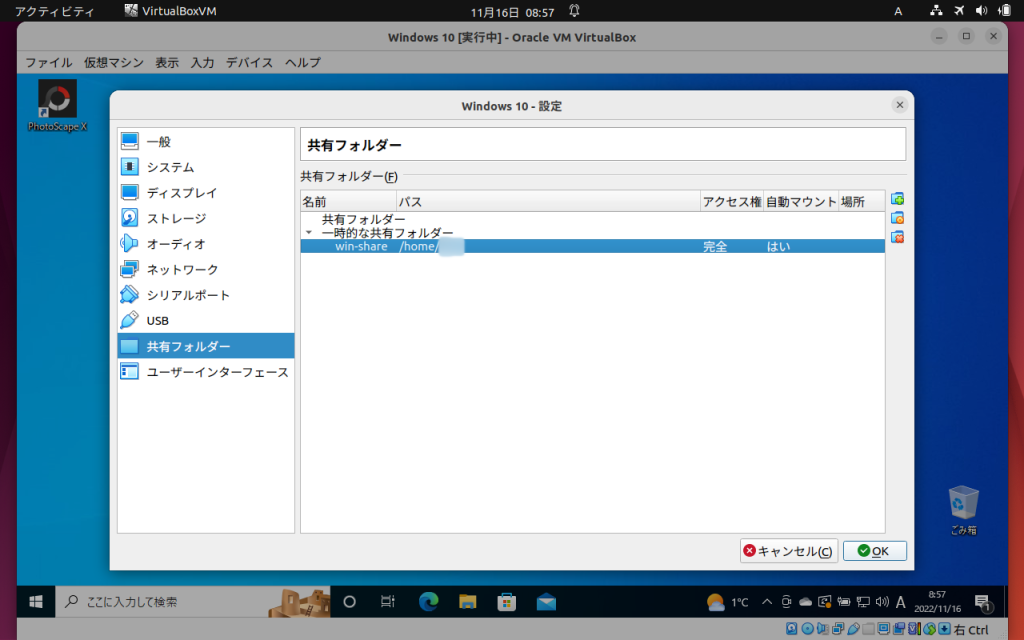
この設定で、一時的な共有フォルダーが作成されました。
UbuntuとWindows 10のファイル共有の動作確認
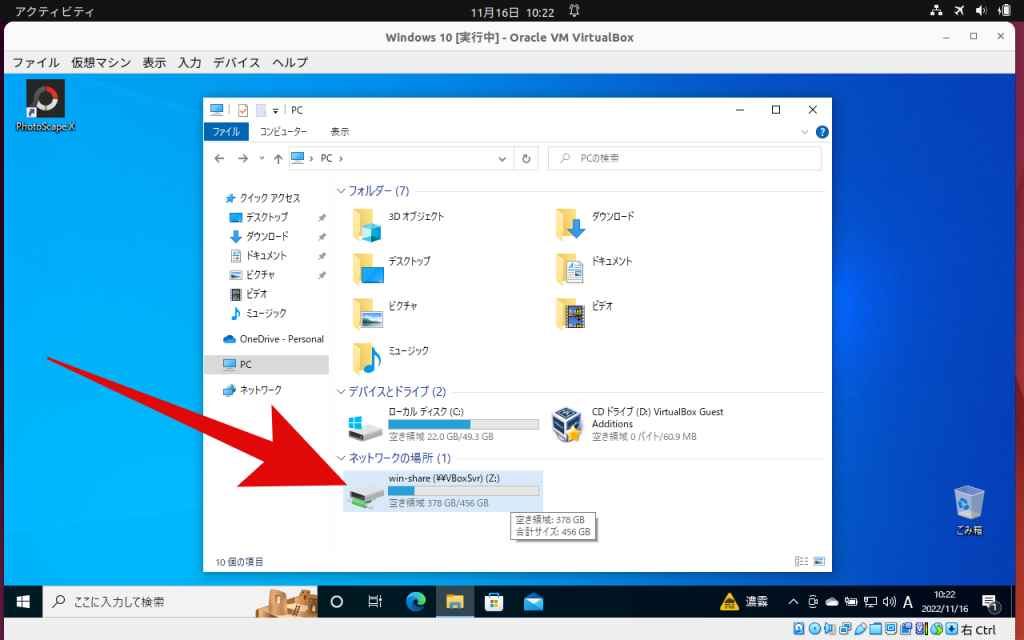
Windows 10仮想マシンの「ネットワークの場所」に、Ubuntuのホームディレクトリのファイルが共有されています。
win-shareの名前になっていますね。(共有フォルダー)
ダブルクリックすると、
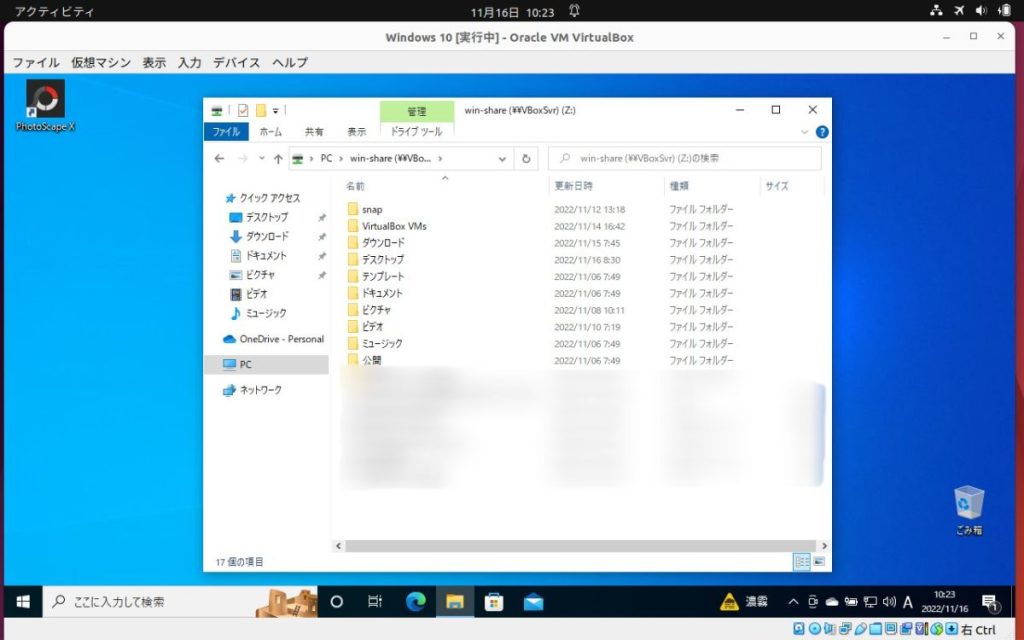
Ubuntuのホームディレクトリの全ファイルを見ることができます。
ドラッグ&ドロップで、Ubuntuのファイルを仮想マシンのWindows 10に保存することも可能です。
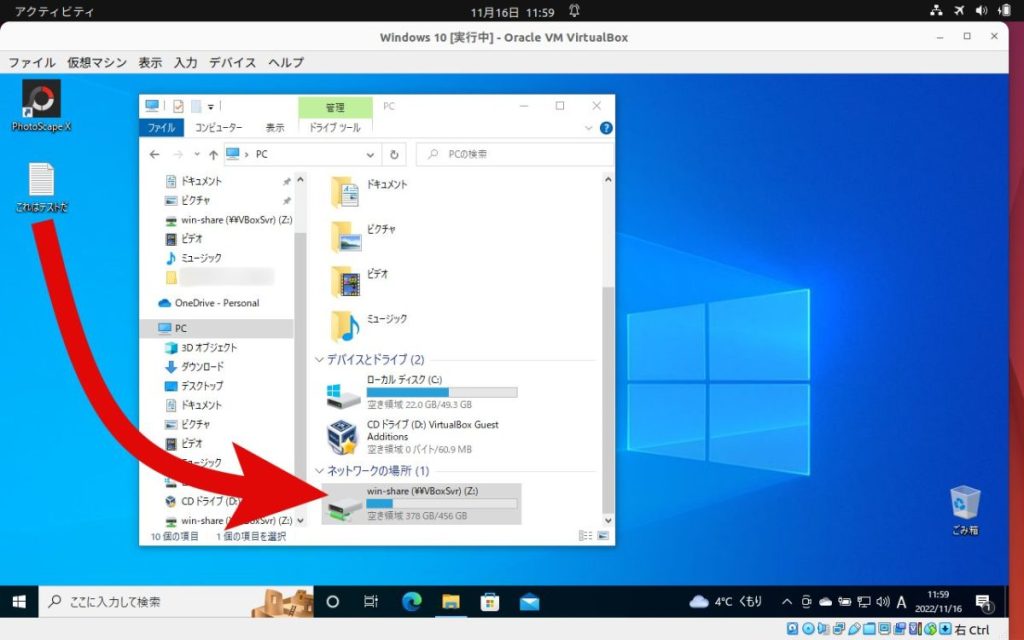
仮想マシンで作成したファイルを、Ubuntuとファイル共有してみます。
ここでは、ドラッグ&ドロップで、共有フォルダーにファイルを入れてみます。
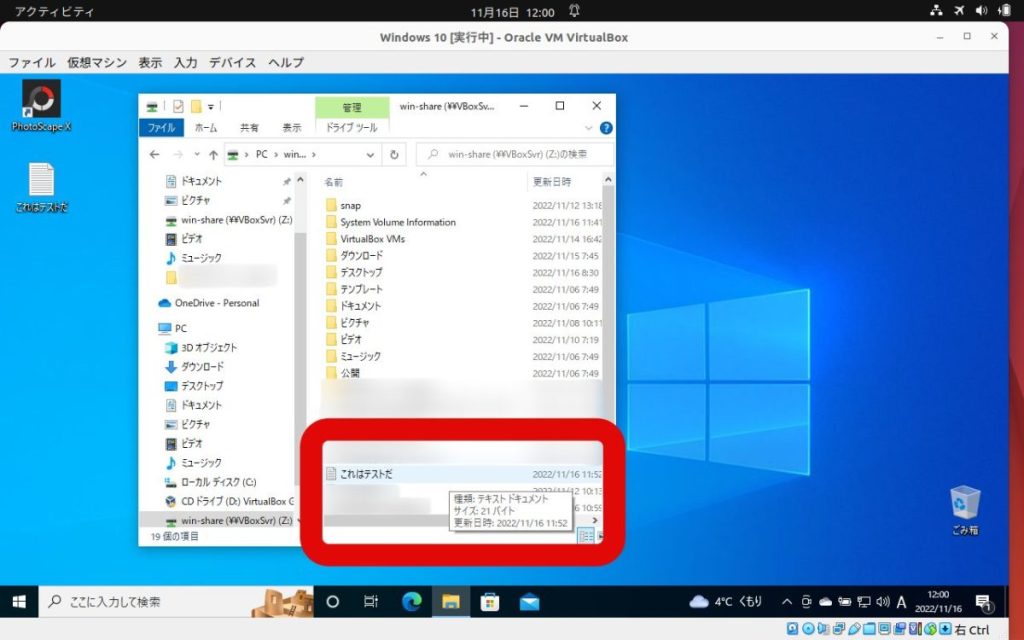
Ubuntuのホームディレクトリに、仮想マシン(Windows 10)で作成したファイルが保存されました。
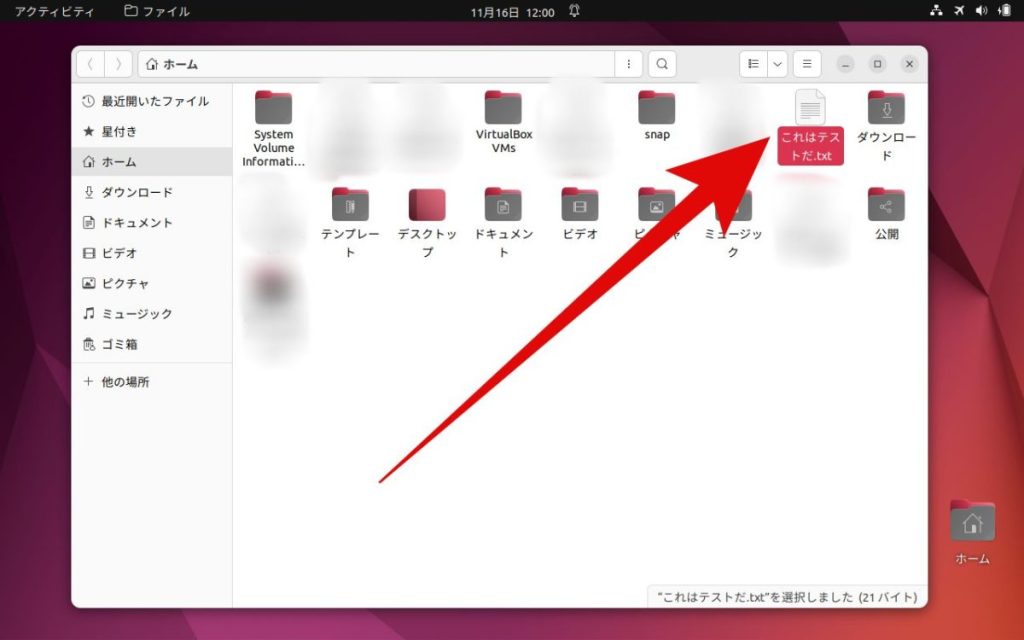
ホストOSのUbuntuでも保存されているのを確認。
ファイル共有の設定に成功しました。
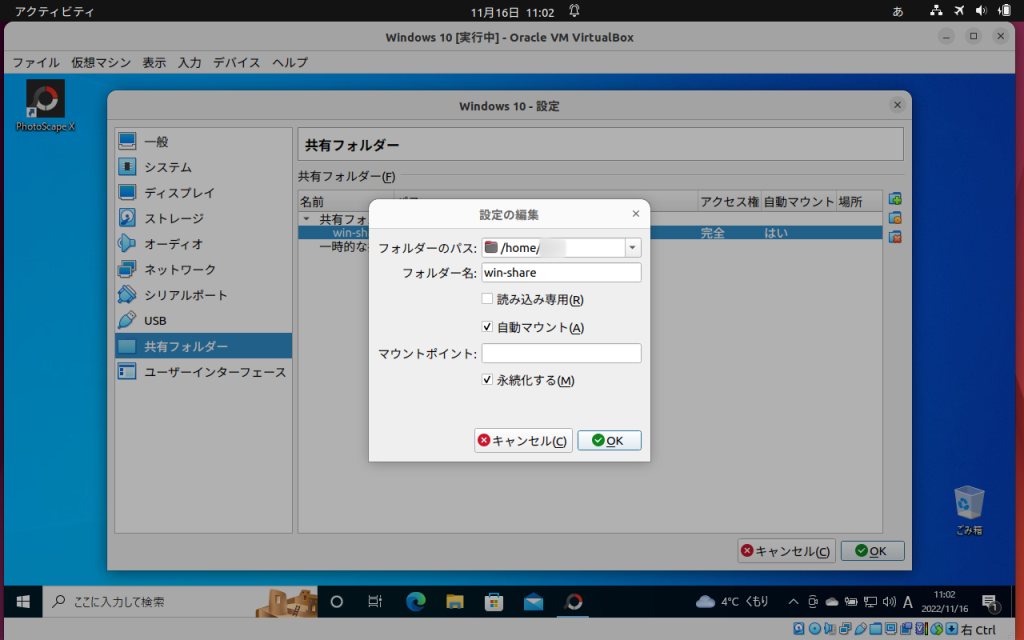
共有フォルダーの設定編集で、永続化するにチェックを入れて設定は完了です。
スポンサードリンク
UbuntuのVirtualBoxでWindowsとファイル共有する設定方法については以上になります。